Website: https://d360.dgtra.com
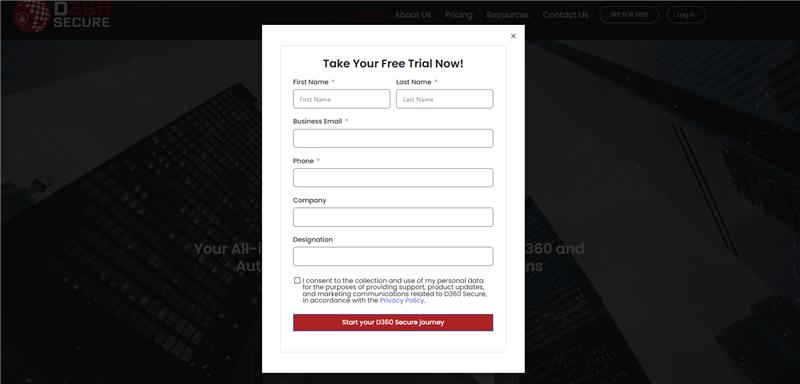
To activate the trial click on “Try for free”.

Fill the form to start your D360 Journey.
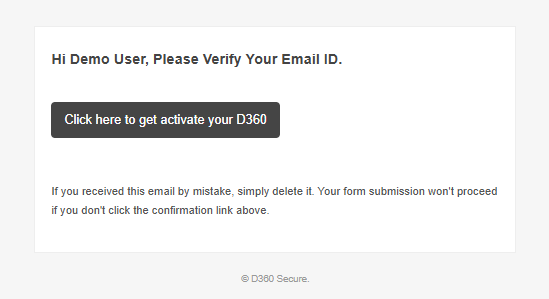
After filling the form, you will receive a mail on the registered Email ID.
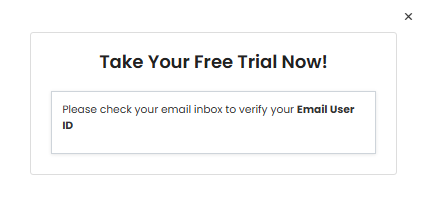
Check your mail inbox for confirmation:
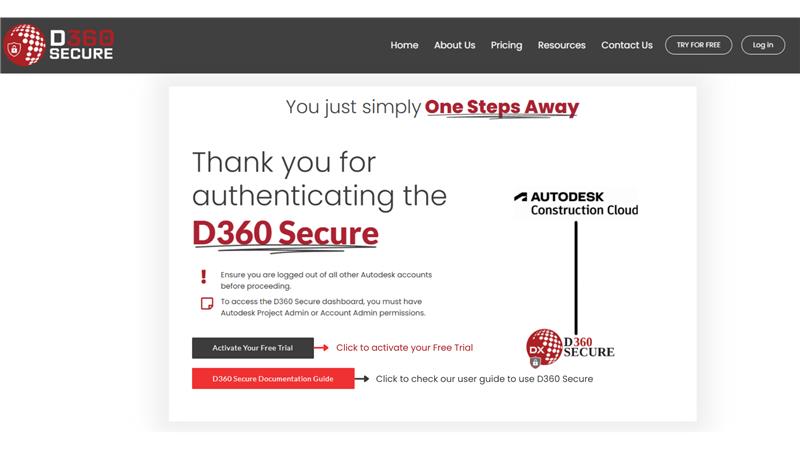
After verifying your email, you will be directed to our authentication page.
Now, you can click on “Activate Your Free Trial” to start using D360 Secure!
If you want to check out our D360 Secure User Guide to see how to use our product, You can simply click on the “D360 Secure Documentation Guide”. Which is highlighted on below proof.
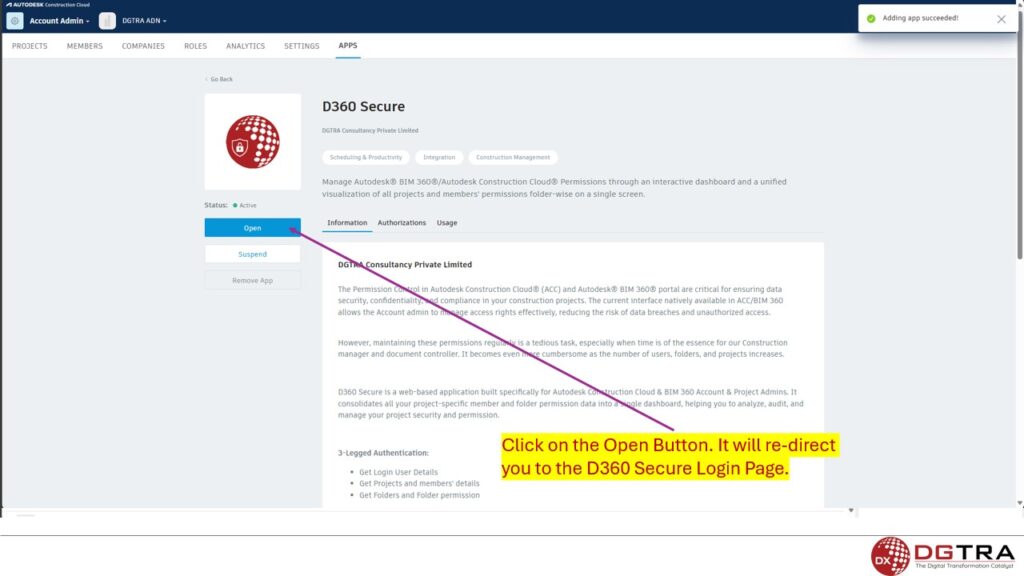
On clicking “Activate Your Free Trial” You will be redirected to the application:
On clicking “D360 Secure Documentation Guide”, you will be redirected to our User Guide where you can see every step in detail to use our product more efficiently on clicking on the tabs:
Note: If you are a D360 Secure subscribed user please click on the “Login” to start.
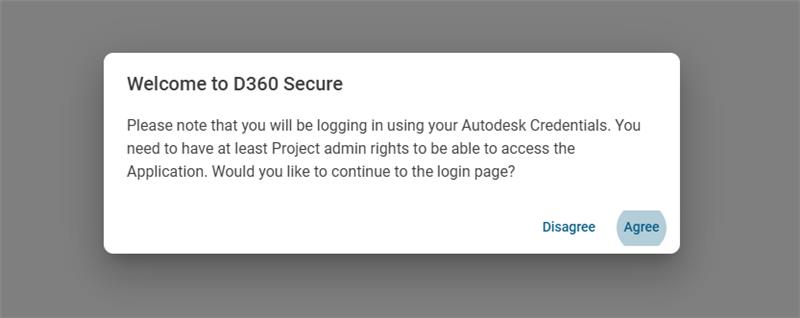
The application requires you to be a ACC/BIM 360 Project Admin to be able to access the Portal. Also, you must be a project admin to be able to utilize the application. Click to agree.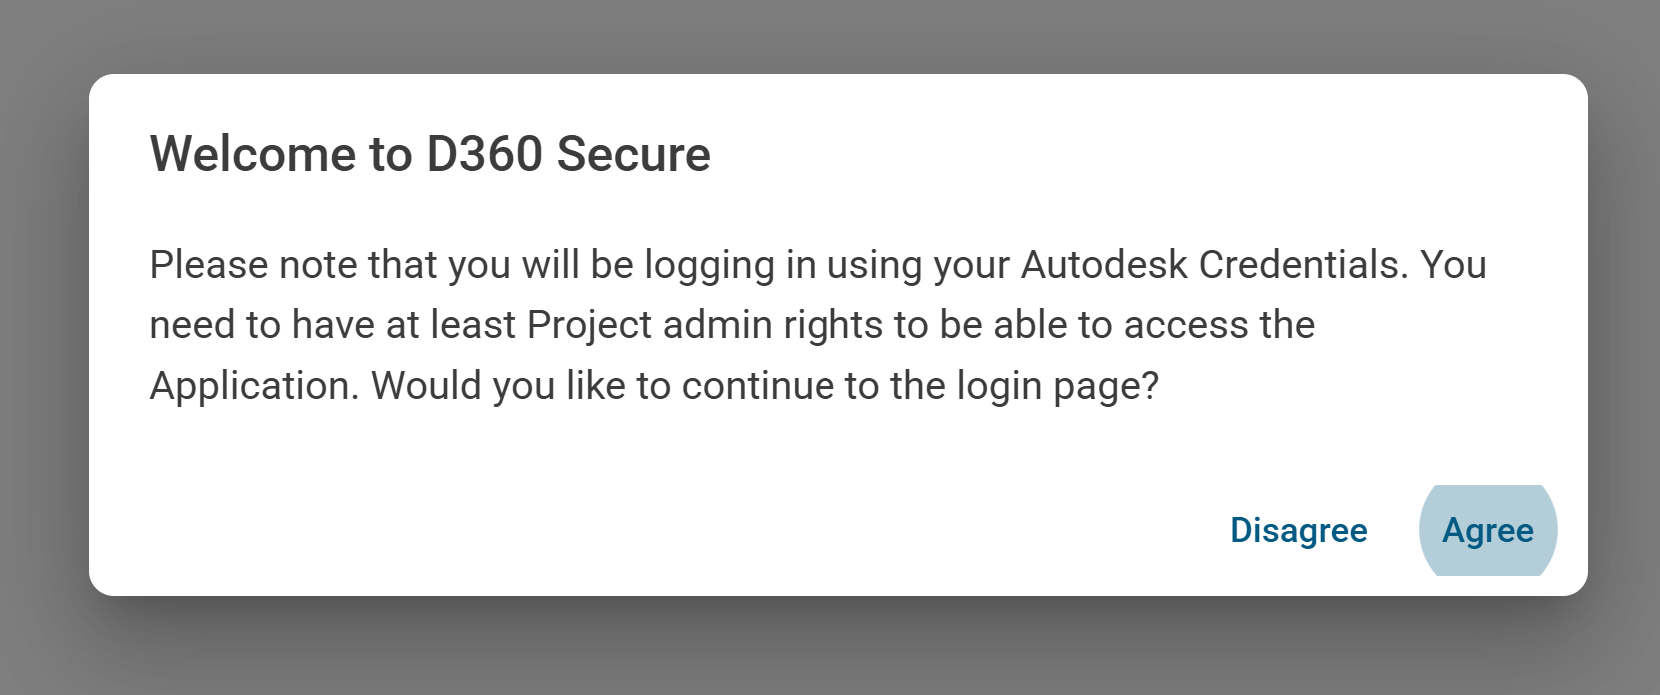
D360 Secure consolidates all your project specific member and folder information into a single Dashboard. For this, we need your permission to access your data from ACC / BIM360. Click Allow to Enter.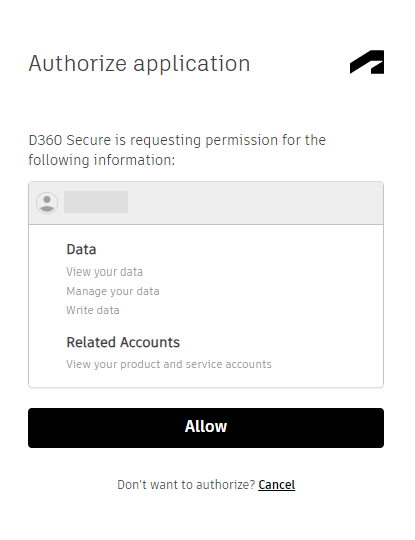
Welcome to the Homepage of D360 Secure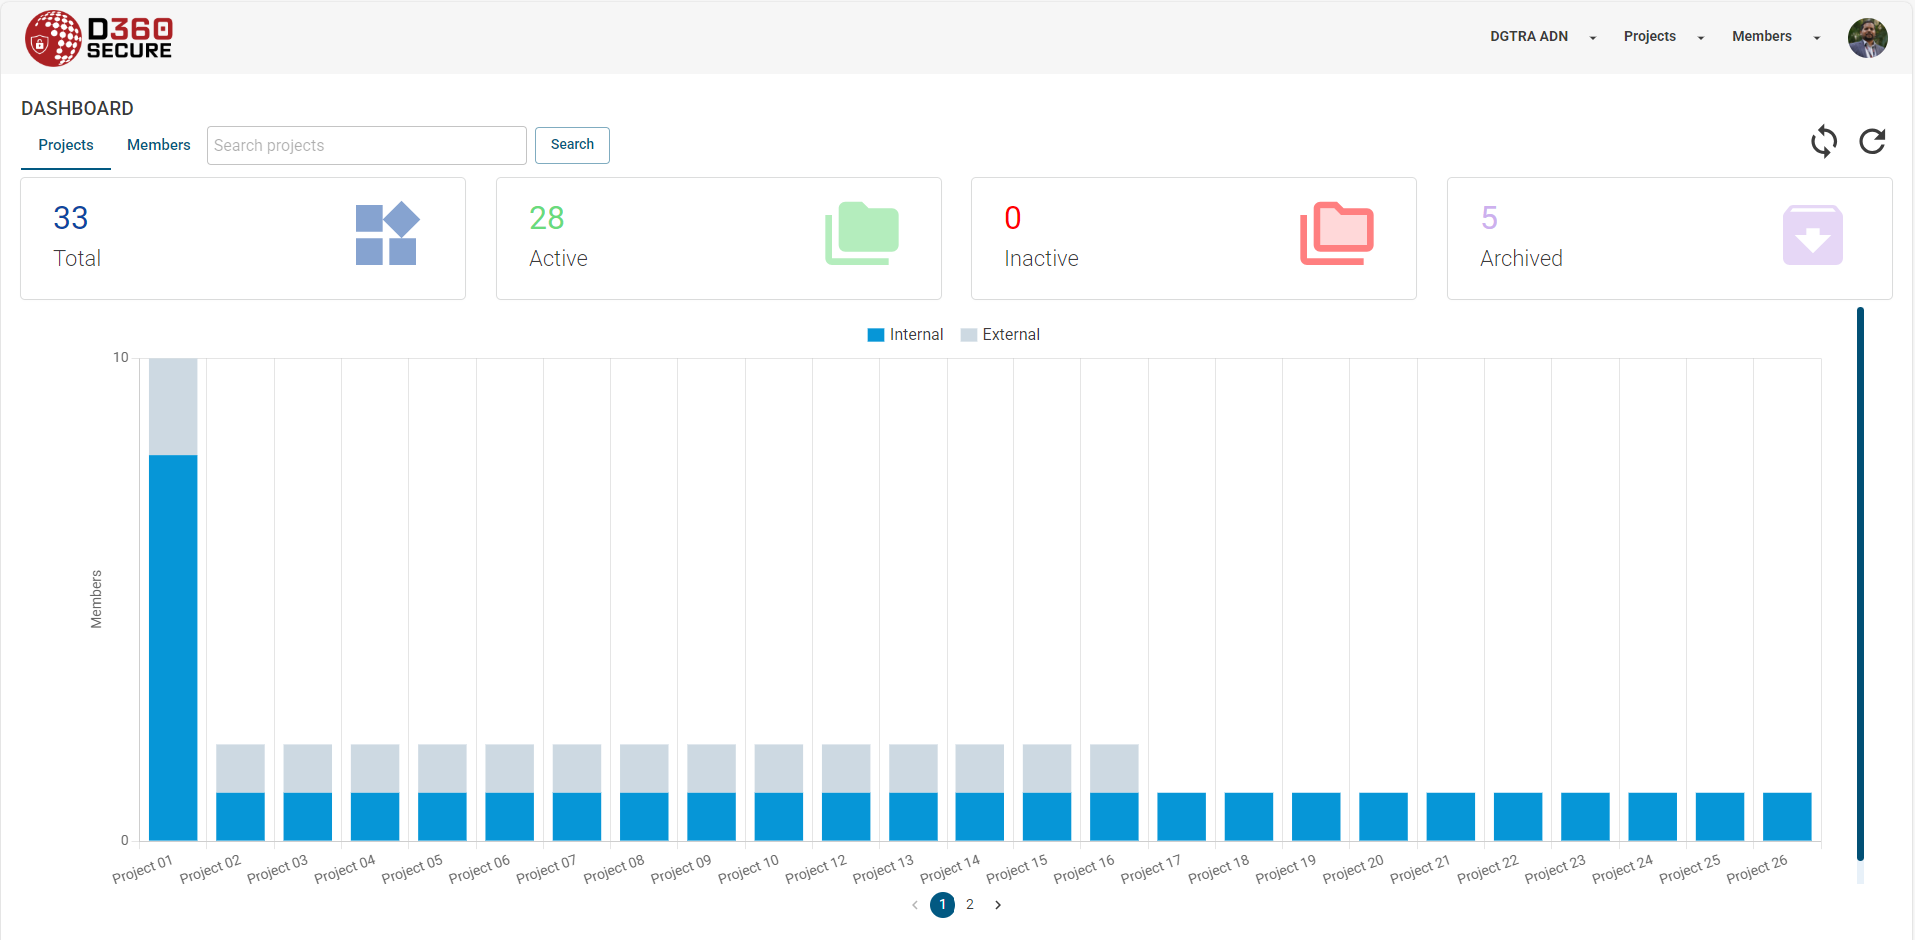
Account Selector: Toggle between different accounts you have access to. You must have the Application installed in these accounts. While the user is in the “Projects” tab, they are unable to change the account selection. To modify the account or switch to a different one, the user must first navigate back to the dashboard.
Projects tab: Toggle between different projects that you have access to. You can also select Multiple Projects from this Project Tab.
Members tab: Toggle and select account members. You can also search for Members using their Display Names.
User tab: Click on the User tab to find out information related to your subscriptions & Trials
Search Projects: While in the Projects Tab, the search tab will help us to search the projects by their names on the dashboard. Total Project Count: This tile gives us the total number of Projects in your Account.
Total Active Count: This tile gives us the total number of Active Projects in your Account.
Projects Tab Dashboard: This Projects dashboard showcasing all the projects where you are the Project admin and details on the count of users in the Project. It also bifurcates on the Number of Internal & External Member in the Project.
Total Inactive Count : This tile gives us the total number of Inactive Projects in your Account.
Total Archived Count : This tile gives us the total number of Archived Projects in your Account.
You can click on the Project Bar to enter the Project.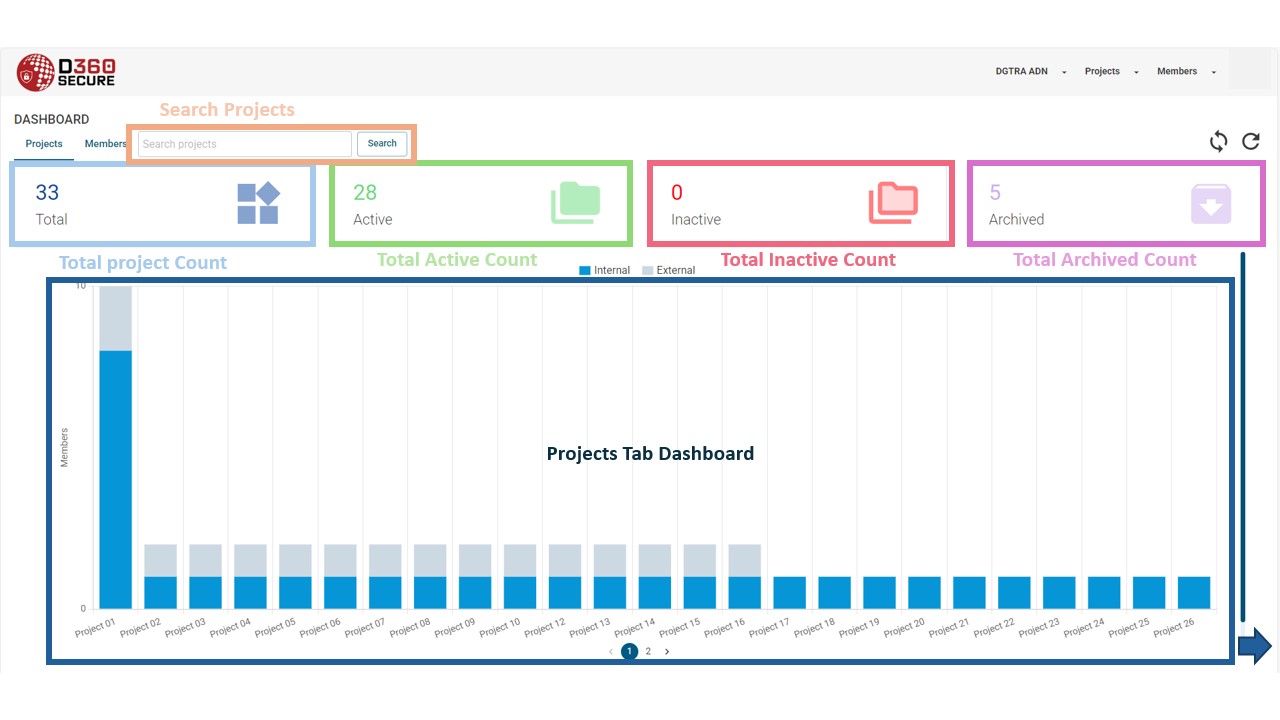
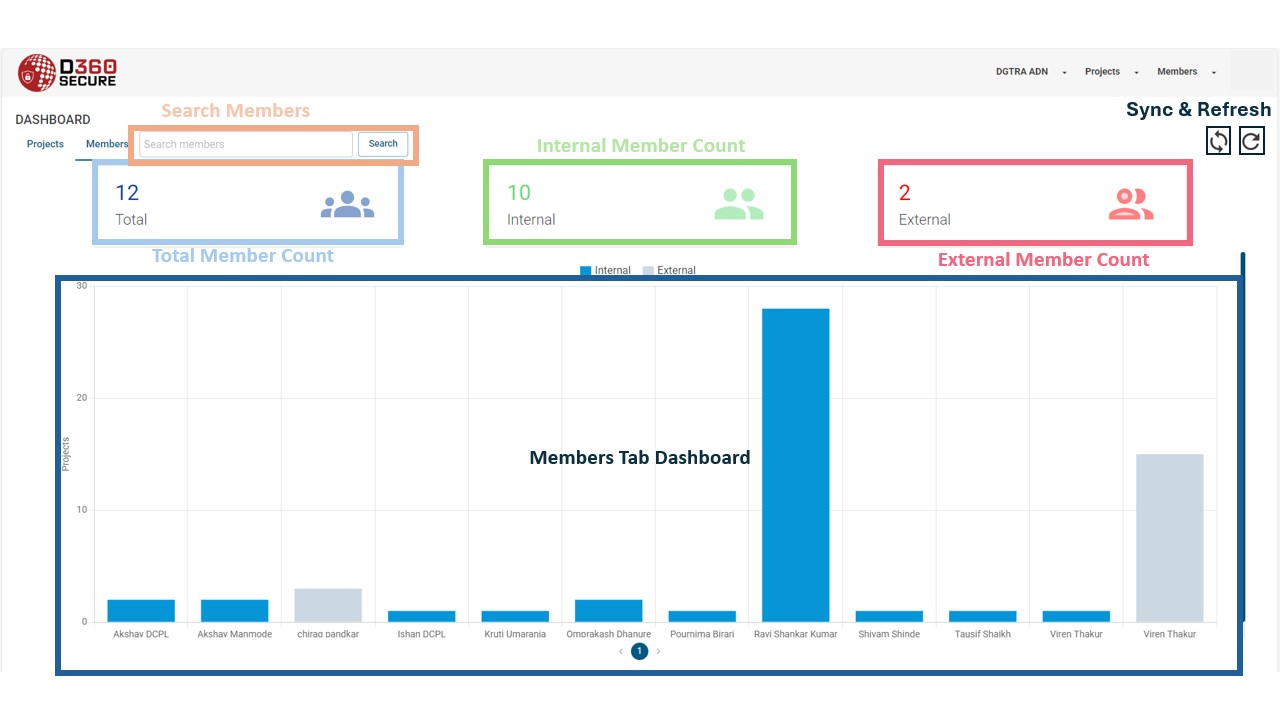
Search Members: While in the Members Tab, the search tab will help us to search the members by their names on the dashboard.
Total Member Count: This tile gives us the total number of Members Present in your Account.
Total Internal Member Count: This tile gives us the total number of Members from Your organization, having the same email Domain as you, Present in your Account.
Total External Member Count: This tile gives us the total number of Members from outside Your organization, having different email Domain from yours, Present in your Account. You can click on the Member Bar to enter the Members Project.
Members Tab Dashboard: This Projects dashboard showcases all the members in your account and the Number of projects they are added in. It also highlights on the Internal & External Members in the Project. You can Select the Member to get details about the project folder permission matrix.
Sync Button: When you press the Sync Button, it instantly retrieves the latest permission updates for the project open on the dashboard. This is particularly useful when someone is actively working on the project data, and you need to check modifications made to permissions by other users.
Refresh Button: By pressing the Refresh Button, the system reloads and updates all ACC/BIM360 permissions across your projects. While this feature ensures a complete overview, it takes longer than the Sync Button since it processes data for all projects in your account.
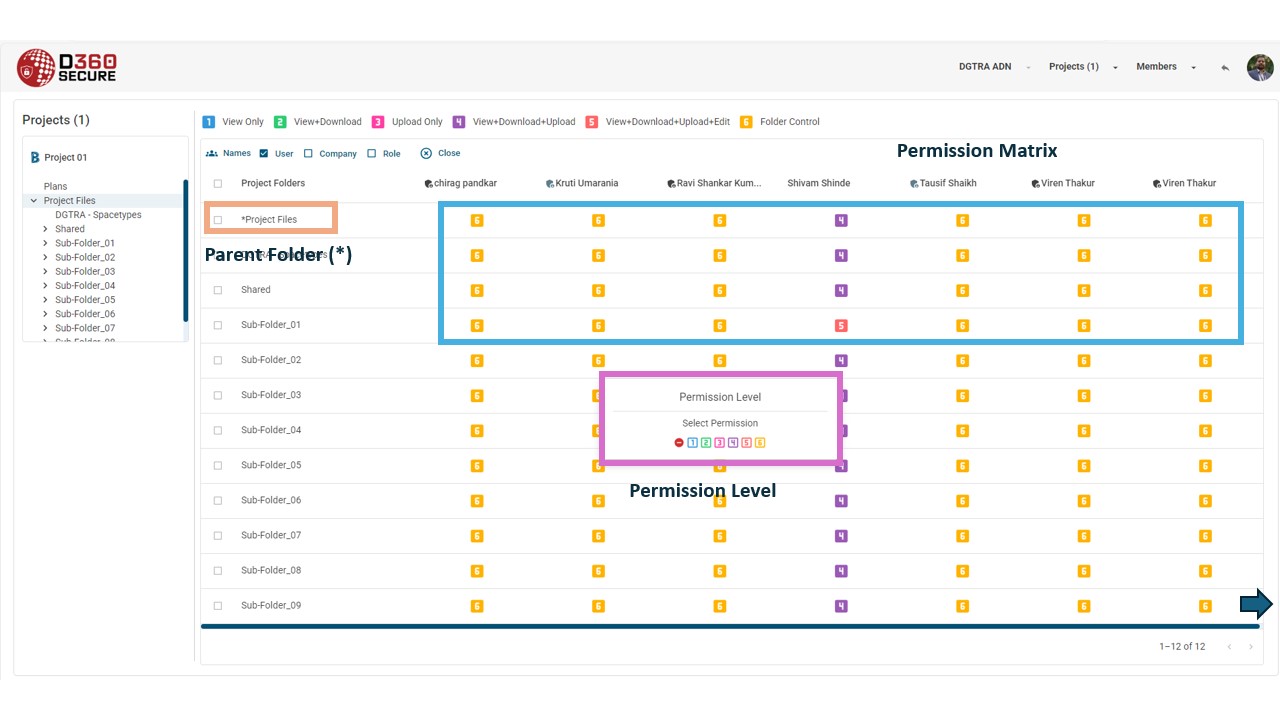
Project Folder Breakdown Structure (Y-Access): Here you will be able to see the folder structure exactly as it is on the ACC/BIM360 Portal. You can select the folder whose permissions you need to audit / Verify.
Legend of Permission: These are the Permissions which are available on ACC/BIM360. We have associated them with Numerical numbers to keep the interface clean.
Edit Button: By default, you will be able to view the permissions given to certain folders but will not be able to make changes in the permissions. To make changes, you will first need to activate the Edit Button.
Recipient List (X-Access): Folder wise permissions on ACC/BIM360 are usually given to Individual Users, Entire Companies or Specific Roles. They are all visible on this chart. You also have the option to check only User, Company or Role as per your convenience. Details of the Members of the company and the list of employees with certain roles can be known by clicking the circle next to it. Project admins and Account admins also have Shields next to them. (Account Admins are Dark Shields, Project Admins are Light Shields)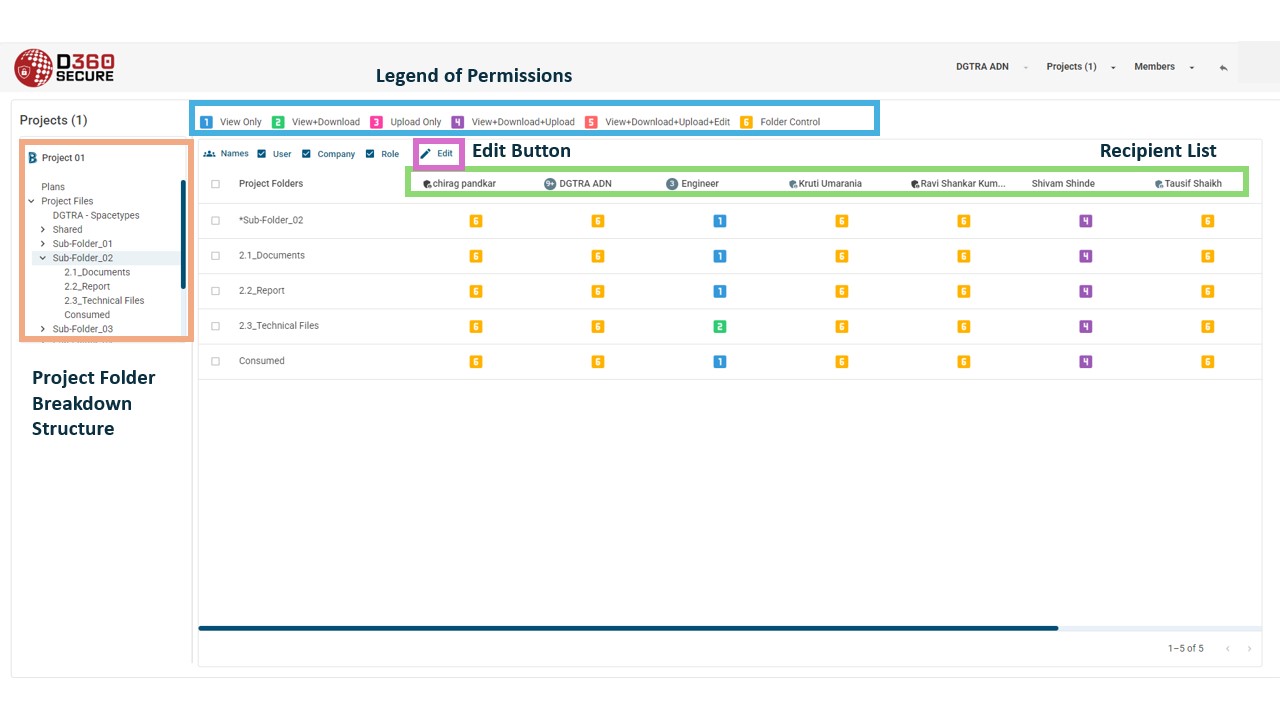
Parent Folders (*): These are the folders which have sub-folders (child folders) within them. Usually when a parent folder is given a permission, those permissions are inherited by the sub-folders as well. The Child folders can not have permissions less than the Parent Folder.
Permission Matrix: By default, you will be able to view the permissions given to certain folders. To make changes, you will first need to activate the Edit Button.
Project List: Here, we can see the list of projects in which the user is a member. We can select the project in which we want to audit and make changes in the permissions.
Permission Level: Click on the Permission you want to change, and the Permission Level Pop-up will appear. You can also select multiple folders and change the permissions in the same manner.